


Diaphragm Pump
Diaphragm Pump Installation Guide: How to Install a Diaphragm Pump Correctly in 8 Steps

Dec
Diaphragm pump installation guide: how to install an AODD pump correctly
Diaphragm pump installation guide content is essential for ensuring reliable performance, long pump life, and safe operation. While Air-Operated Double Diaphragm (AODD) pumps are known for their simplicity, incorrect installation is one of the most common causes of poor performance, premature diaphragm failure, and unnecessary downtime.
This step-by-step diaphragm pump installation guide explains how to correctly install a diaphragm pump, covering air supply, suction and discharge layout, mounting, and commissioning best practices.

Why Correct Diaphragm Pump installation matters
Incorrect installation can lead to:
- Poor priming
- Reduced flow rate
- Excessive air consumption
- Rapid diaphragm wear
- Cavitation and vibration
- Safety risks in hazardous areas
Following a proven diaphragm pump installation guide ensures consistent performance and reduces long-term maintenance costs.
Step 1: Choose the correct installation location
Before connecting any pipework or air supply, ensure the pump location is suitable.
✔ Installation best practices
- Mount the pump as close to the fluid source as possible
- Minimise suction lift
- Ensure easy access for maintenance
- Allow sufficient clearance for diaphragm and valve servicing
For best performance, a flooded suction (fluid level above pump inlet) is always preferred.
Step 2: Mount the diaphragm pump securely
Diaphragm pumps can be mounted in multiple orientations, but stability is critical.
✔ Mounting Guidelines
- Use a solid, vibration-free base
- Secure the pump using mounting feet or brackets
- Ensure the pump is level
- Avoid flexible or unsupported mounting surfaces
Excessive vibration accelerates wear on diaphragms and check valves.
Step 3: Install the Suction Line Correctly
Poor suction layout is one of the biggest installation mistakes.
✔ Suction line best practices
- Keep suction pipe as short as possible
- Use pipe diameter equal to or larger than pump inlet
- Avoid sharp bends, elbows, and restrictions
- Use reinforced suction hose to prevent collapse
- Ensure airtight connections
❌ Avoid
- Long suction runs
- Undersized pipework
- Air leaks on the suction side
Step 4: Install the Discharge Line
The discharge line should allow smooth, unrestricted flow away from the pump.
✔ Discharge best practices
- Match discharge pipe size to pump outlet
- Avoid unnecessary restrictions
- Support pipework to reduce stress on pump ports
- Install flexible connectors if vibration is present
If pulsation is an issue, consider installing a pulsation dampener.

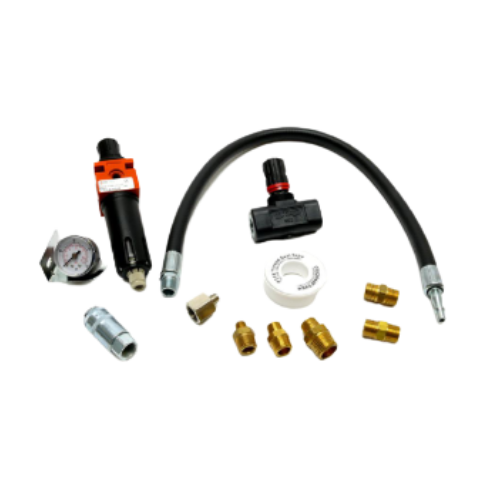
Step 5: Connect the Air Supply
AODD pumps rely entirely on compressed air – correct air supply is critical.
✔ Air supply requirements
- Clean, dry, regulated air
- Correct pressure (as per pump specifications)
- Adequate airflow (SCFM / m³ / hr)
✔ Best practices
- Install a filter-regulator (FR) unit
- Use air line equal to or larger than the pump air inlet
- Avoid long, restrictive air lines
Step 6: Check material Compatibility
Before commissioning, confirm that all wetted materials are compatible with the fluid being pumped.
Incorrect material selection can cause:
- Diaphragm swelling
- Chemical attack
- Seal failure
- Product contamination
If you are unsure about what material you should be using, check out our chemical compatibility guide at Aroplus.com
Step 7: Commission the Diaphragm Pump
Once installed, commissioning should be done gradually
✔ Commissioning steps
- Start with low air pressure
- Allow the pump to self-prime
- Slowly increase air pressure
- Check for leaks (air & fluid)
- Confirm stable cycling and flow
Never immediately apply maximum air pressure.
If you need help commissioning your pump, get in touch with us today
Step 8: Installation in hazardous (ATEX) Areas
If the pump is installed in a potentially explosive atmosphere:
- Use ATEX certified diaphragm pumps
- Ensure proper grounding and bonding
- Avoid static-generating materials
View the official ATEX guidance

Common Diaphragm Pump Installation Mistakes
Avoid these frequent errors:
❌ Undersized suction pipe
❌ Air leaks on suction side
❌ Insufficient air supply
❌ Excessive suction lift
❌ No air filtration
❌ Incorrect diaphragm material
Most diaphragm pump problems originate from poor installation – not pump quality.
Maintenance checks After Installation
After the first few hours of operation:
- Re-check fasteners
- Inspect hose connections
- Confirm air pressure stability
- Monitor diaphragm cycling rate
Routine checks prevent early-life failures.
Conclusion: Follow this diaphragm pump installation guide for reliable operation
Correct installation is the foundation of reliable diaphragm pump performance. By following this diaphragm pump installation guide, you can ensure optimal flow, reduced air consumption, longer diaphragm life, and safer operations.
👉 Browse Diaphragm Pumps
👉 Contact Diaphragm Pumps for technical support
Do diaphragm pumps need a flooded suction?
No, but flooded suction improves priming and reduces wear.
Can a diaphragm pump run dry?
Yes – Diaphragm pumps can run dry without damage, but prolonged dry running increases wear.
What air pressure should I use?
Always follow the manufacturer’s recommended air pressure limits.
Why won’t my diaphragm pump prime?
Common causes include air leaks, excessive suction lift, or blocked check valves.